Retaining wall basics: How to tame a slope without starting a landslide
Key Takeaways
A retaining wall can turn an awkward slope into useful ground, but only when we deal with soil, water, loads, and local requirements together.
- Start with the slope, soil, drainage, and wall height—not the colour of the blocks.
- Choose a wall type that suits the ground conditions and the forces involved.
- Build a stable base, keep each course level, and backfill in controlled layers.
- Give water a planned route through and around the wall.
- Inspect early signs of movement before a small repair becomes a major rebuild.
What a retaining wall actually does
A retaining wall holds back soil where the natural slope would otherwise continue downhill. That sounds simple, though the ground is not famous for obeying simple instructions. Good retaining wall basics begin with understanding the pressure behind the wall, the water moving through the site, and the loads sitting above it.
We are not just stacking attractive material against a bank. We are creating a structure that has to stay stable while the soil gets wet, dries out, settles, and responds to the seasons. A wall can improve access and reduce erosion, but it cannot magically correct every problem on a troublesome slope.
The forces pushing soil downhill
Soil presses sideways against a retaining wall because gravity wants the soil mass to spread and slide down the slope. Wet soil is heavier, and water trapped behind the wall can add pressure of its own. A driveway, shed, fence, paving, or even stored materials near the upper edge can increase the load the wall must resist.
The wall has to resist sliding, tipping, and bearing failure beneath its footing or base. Its shape, weight, embedment, reinforcement, and drainage all matter. A short garden edge and a wall holding back a steep bank may look similar from the patio, but they are not the same job.
When a wall solves a problem—and when it merely hides one
A wall is useful when it creates a stable change in level, protects a lower area from erosion, or makes a slope safer to use. It may also help us form terraces for planting or improve how surface water travels across the site. The wall should be part of a wider plan rather than a decorative patch over unstable ground.
If the bank is already slipping, the soil is saturated, or water is emerging from several points, building directly in front of the problem can conceal movement without stopping it. We should first identify where the water and soil are coming from. Otherwise, the new wall may simply become the most expensive witness to the original issue.
Signs your slope needs professional attention
Some sites are poor candidates for casual weekend construction. A tall wall, a steep slope, nearby structures, weak or wet soil, and heavy loads at the top all deserve careful assessment. We should also pause if the wall could affect a neighbour’s land, a driveway, a building, or a public path.
Bulging ground, fresh cracks, leaning trees, exposed roots, and sudden muddy seepage suggest that the slope is moving or water is finding an unwanted route. Small warning signs matter because movement rarely becomes easier to manage after we ignore it for a season.
Choosing the right type of retaining wall
The best wall type depends on height, available space, soil, drainage, appearance, access, and the loads around it. We should resist choosing material first and then trying to persuade the site to accept it. The ground gets a vote, and it is usually the loudest one.
A small, low gravity wall may be straightforward, while a taller or heavily loaded wall may need a structural design and specialist construction. We also need to consider how the wall will be built, where equipment can work, and how future maintenance will be managed.
Gravity walls: letting mass do the heavy lifting
Gravity walls rely mainly on their own weight and geometry to resist the soil behind them. They can be made from stone, concrete units, masonry, or other suitable materials, but “heavy” does not mean “automatically safe”. The base still needs a stable foundation, and the wall still needs a way to release water.
A gravity approach can suit a lower wall with enough room for a broad base. If space is tight, the wall is high, or the upper ground carries significant load, simply making the wall heavier may not be practical. We need to look at the whole cross-section, not only the face visitors see.
Cantilever and reinforced walls: strength with a structural assist
Cantilever walls use a structural stem and base arrangement so the soil above part of the base helps resist overturning. Reinforced systems may use steel, concrete, geogrid, or other designed components to improve stability. These are not places for guesswork about bar sizes, spacing, or connection details.
Once a wall relies on engineered reinforcement, the design needs to match the actual soil, height, loads, and construction method. We should follow the supplied design and installation requirements precisely rather than borrowing details from a different site. A reinforcement component is not a substitute for drainage or a properly prepared base.
Segmental block, timber, concrete, and stone compared
Different materials bring different construction demands, service expectations, and visual character. The table below is a useful first comparison, not a replacement for checking the site or the wall system’s requirements.
| Wall material or system | Strengths | Watch points |
|---|---|---|
| Segmental block | Consistent units, tidy appearance, and systems designed for interlocking | Base preparation, batter, and drainage must follow the system requirements |
| Timber | Warm appearance and relatively easy handling | Moisture, decay, movement, and ground contact need careful consideration |
| Concrete or masonry | Strong, clean lines and broad design flexibility | Cracking, reinforcement, footing design, and drainage can be critical |
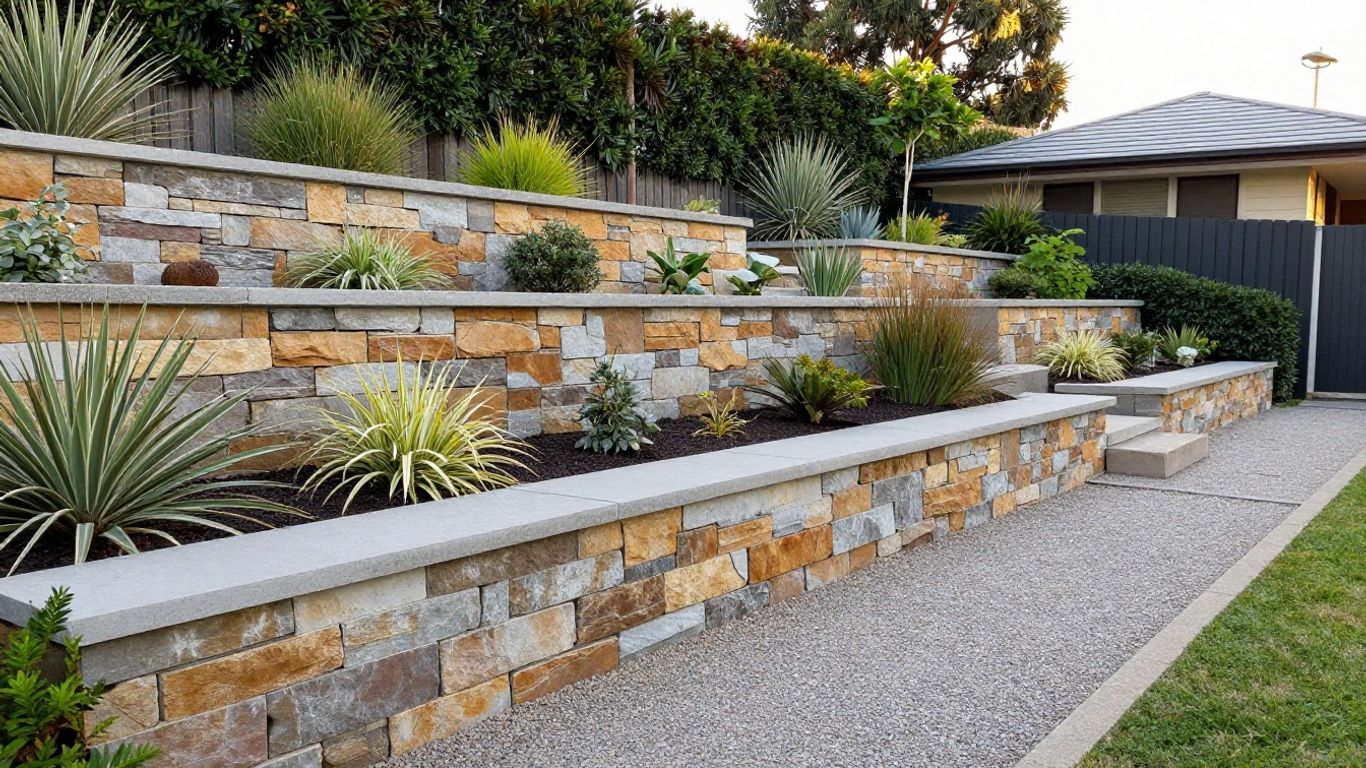
| Natural stone | Characterful finish and good landscape integration | Irregular pieces demand careful placement, stable support, and generous labour |
The sensible choice is the material we can install correctly and maintain sensibly. A beautiful finish will not compensate for a wall that has no stable foundation or a blocked drainage route.
Terraced walls for slopes that refuse to behave
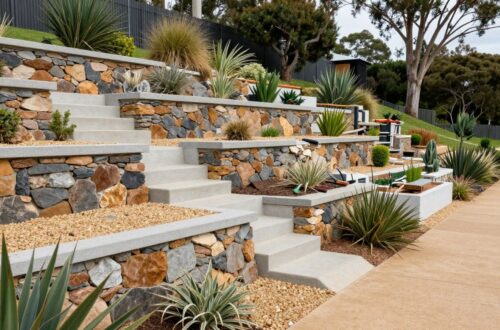
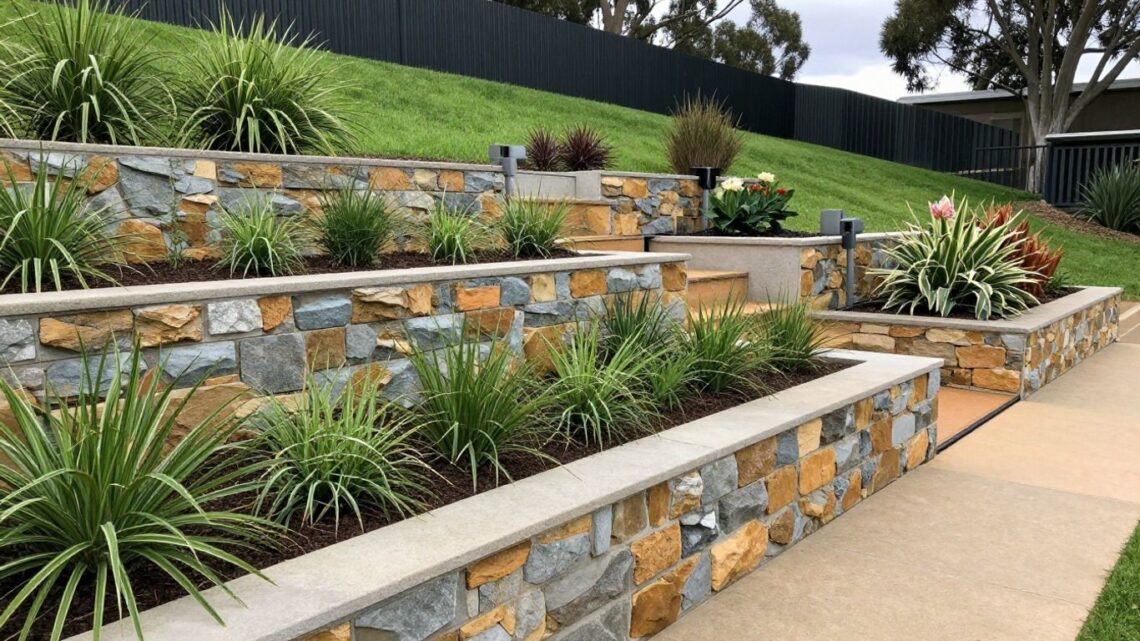
Several smaller terraces can sometimes manage a slope more gracefully than one tall wall. Terracing can reduce the height of each wall, create planting areas, and break a long run into more approachable sections. It still changes how water and soil loads move through the site, so the terraces cannot be treated as unrelated garden edging.
We need enough horizontal space between levels, a stable route for runoff, and a plan for the upper terrace loads. Poorly spaced terraces can act like one tall wall with extra joints—an arrangement nobody ordered. Where the slope is steep or the consequences of movement are serious, get the design checked before digging.
Planning the site before breaking ground
Planning is where we save ourselves from expensive improvisation. We should measure the site, inspect the soil, locate buried services, check rules, and price the unglamorous parts before ordering materials. A sketch with levels and distances can reveal problems that are invisible from the back door.
Take photographs as the site changes, mark the wall line clearly, and think about where spoil, deliveries, tools, and excavated soil will go. The wall may occupy a narrow strip, but construction needs room to happen without undercutting nearby ground.
Measuring height, slope, and setback
Measure the proposed wall from the lowest finished ground in front to the retained ground behind, then check the levels along its full length. Slopes rarely read the same at both ends. Record the distance to buildings, fences, property boundaries, trees, driveways, and other structures.
The setback at the top matters because loads close to the edge affect the wall more than loads farther away. Include planned paving, garden beds, play areas, or vehicle access rather than designing for an empty lawn that may not remain empty for long.
Checking soil conditions and underground utilities
Look at the soil while excavating, but do not assume a shallow glimpse tells the whole story. Clay, loose fill, sand, gravel, rock, and layered ground behave differently, especially when wet. Signs of seepage, soft spots, buried rubble, or previous disturbed ground deserve extra attention.
Before breaking ground, arrange the appropriate service-location checks for the property and region. A shovel is a poor tool for discovering a cable, pipe, or old drain. We should also identify irrigation lines, stormwater routes, septic infrastructure, and any private services that may not be covered by a standard public-service search.
Understanding permits, property lines, and local rules
Requirements vary with wall height, location, drainage, boundary proximity, and local planning or building rules. We should check with the relevant council or authority before construction, especially where the wall sits near a boundary, road, easement, or neighbouring property.
Do not treat a property fence as a reliable survey marker. Confirm the boundary when the position matters, and discuss any drainage changes that could send water onto another property. Good neighbourliness is pleasant; repairing someone else’s soggy garden is less so.
Estimating materials, labor, and the cost of surprises
Price the base material, wall units or stone, drainage aggregate, pipework, filter fabric, caps, delivery, excavation, compaction, disposal, and access. Labour can change sharply when materials must be carried by hand or when machinery cannot reach the work area. Include time for sorting stone and correcting the inevitable “that level looked right from over there” moment.
A useful estimate separates the planned wall from the risks beneath it. Allow for unsuitable soil, extra excavation, rock, wet conditions, damaged materials, and changes required after the trench is open. That is not pessimism; it is simply giving the ground permission to reveal itself.
Designing drainage so water does not become the villain
Many wall failures begin with water that has nowhere sensible to go. Rain can enter the retained soil, groundwater can rise behind the wall, and surface runoff can concentrate along the top. If pressure builds, the wall may lean, bulge, crack, or lose support beneath its base.
Drainage is not a decorative accessory added after the wall looks finished. It needs to be planned with the wall section, outlet location, surrounding levels, and maintenance access. We want water to move through a controlled path rather than inventing one through the weakest joint.
Why hydrostatic pressure causes wall failures
When water becomes trapped behind a wall, it presses outward and increases the load on the structure. Saturated soil can also lose strength, allowing the retained bank to move. A wall that copes during a dry week may behave very differently after prolonged rain.
The warning signs include damp patches, staining, blocked outlets, bulging faces, and water appearing at the base where it should not be concentrated. We should not seal visible cracks or repaint stains before understanding the source. Cosmetic work can make the evidence less obvious while the pressure continues.
Gravel backfill, drainpipe, and filter fabric basics
A typical drainage arrangement may include clean drainage aggregate behind the wall, a perforated drainpipe at the low point, and filter fabric that limits soil migration into the drainage zone. The exact arrangement depends on the wall system and site conditions, so we follow the design rather than treating a generic cross-section as universal.
The pipe needs a continuous fall or a designed outlet, and the discharge point must be safe. Aggregate should be kept reasonably clean while it is placed; muddy fill can clog the very voids we need to keep open. Fabric edges and pipe connections also need care because small gaps can become busy little soil chutes.
Managing surface runoff above and below the wall
The ground above the wall should direct surface water away from the face or into a planned collection route. Downpipes, paths, paving, and garden beds can all send more water toward the wall than the lawn did. At the bottom, water should not pond against the base or erode the soil supporting it.
We can often improve performance with swales, grated drains, edging, or carefully graded surfaces, provided these do not undermine the wall. Before finalising the landscape, trace a storm from the upper part of the block to its intended outlet. If the route only exists in our imagination, it is not a drainage plan yet.
Avoiding clogged drains and soggy shortcuts
Using ordinary soil where drainage aggregate belongs, skipping filter fabric, or ending a pipe where water can soak straight back behind the wall are common shortcuts with long memories. We should keep fine soil out of the drainage zone and protect outlets from mulch, roots, sediment, and debris.
The following checks are worth making before the wall is closed in:
- Confirm the drainpipe has the intended fall and a reachable outlet.
- Keep backfill layers separate from the drainage aggregate.
- Protect outlets while nearby soil, mulch, and planting are installed.
- Make sure surface water cannot wash soil into the drainage path.
Once the backfill hides the system, repairs become slower and messier. A few minutes checking the route before covering it can save a great deal of excavation later.
Building the wall from the ground up
Construction quality is cumulative: every level course, compacted layer, and clean joint contributes to the final result. We should work methodically rather than racing to see the wall’s face. Most walls look forgiving until a small error has been repeated across their full length.
Read the wall system instructions, keep the work area safe, and stop if the excavation becomes unstable. We are building beside heavy soil, not assembling a flat-pack bookcase with better scenery.
Preparing a stable trench and compacted base
Excavate to firm, undisturbed ground where possible, allowing enough width for the wall, base, drainage, and safe working room. Remove organic material and soft pockets rather than burying them under attractive aggregate. The base should be placed in controlled lifts and compacted so it does not settle unevenly.
Check the trench along its length and across its width. A base that is level at one end and soft at the other will pass its first casual inspection but may load the wall unevenly. Keep excavated soil away from the trench edge so it cannot fall back in or overload the excavation.
Setting the first course level and slightly buried
The first course establishes the alignment, height, and behaviour of everything above it. Set it carefully on the prepared base, check each unit in both directions, and bury an appropriate portion where the design requires it. Do not use the following courses to disguise a crooked start; they are surprisingly bad at keeping secrets.
Work from a fixed line or reference level and recheck frequently. Small adjustments are easiest before the next course is placed. The face should follow the planned alignment, while the base remains fully supported rather than perched on a thin edge.
Adding backfill in controlled layers
Place backfill gradually and compact it in layers suited to the material and equipment. Dumping a large heap behind a partly built wall can push it forward before the wall has the support it needs. Keep heavy machinery away from the edge unless the design and construction method allow for it.
Drainage components should remain in their intended position as the fill rises. Check the wall face after each lift and correct movement promptly, while access is still easy. Good backfill work is repetitive, which is exactly why it works.
Creating the right batter, alignment, and height
Many wall systems lean slightly into the retained soil, known as batter, to improve stability. The required batter varies by system and design; we should not invent a slope by eye. Maintain the planned alignment around corners, curves, steps, and changes in height.
Finish height should account for caps, paving, soil, and the final landscape levels. Avoid creating a low point where water can collect behind the top course. Before the last units go on, stand back and inspect the wall from several angles—our knees may know every detail, but our eyes still need the overview.
Making the wall attractive and structurally sound
A retaining wall is a practical structure that happens to be visible. Its appearance should support the landscape rather than distract from how it works. We can choose colours, textures, caps, curves, and planting, but each choice needs to leave the drainage and structure undisturbed.
The best-looking wall usually has calm proportions and a clear relationship with nearby paths, steps, fences, and planting. A little restraint often beats a busy collection of finishes competing for attention.
Matching materials to the landscape and architecture
Choose a material that suits the house, existing paving, garden style, and climate. Stone can soften a natural garden, while clean masonry or blockwork may sit comfortably beside modern lines. Timber can work in a relaxed setting, provided its exposure and ground contact are suitable for the intended service conditions.
We should order enough material from a consistent batch where appearance matters, and inspect pieces before installation. Colour variation can be charming when planned and less charming when it appears as an accidental stripe halfway through the wall.
Using caps, curves, corners, and terracing effectively
Caps protect the top edge, shed some surface water, and give the wall a finished line. Corners and curves need proper support rather than improvised gaps, particularly where the wall changes direction or height. A gentle curve can make a long run feel natural, while too many bends can complicate construction and drainage.
Terracing, steps, and planted breaks can divide a large slope into readable sections. Keep access in mind as the design develops. If the only way to inspect the wall is by balancing on a wet cap, the landscaping has won a small victory over maintenance.
Adding plants without inviting root-related trouble
Planting can soften a wall and reduce the hardscape feel, but roots and irrigation water need consideration. Avoid placing thirsty plants or aggressive roots where they can disrupt drainage, lift paving, or enter joints. Select plants that suit the available soil depth, sunlight, and mature size rather than choosing only for the first season’s appearance.
Keep irrigation controlled and inspect emitters near the wall. A leaking line can quietly saturate the backfill for weeks. Leave outlets visible and accessible, and do not cover them with mulch because a hidden drain is a future detective story.
Balancing appearance with access for maintenance
Leave room to inspect caps, outlets, joints, adjacent soil, and the upper drainage route. Paths and planting should not force us to climb over the wall to reach its most important details. If the wall supports a lawn or garden bed, plan how those areas will be mown, watered, pruned, and reworked.
A neat access strip may seem less exciting than another row of plants, but it pays off every year. We want the wall to remain visible enough that small changes cannot hide behind an overgrown border.
Keeping the wall standing for the long haul
Even a well-built wall needs occasional attention. Ground moves, plants grow, drains collect sediment, and new landscaping can redirect water. A simple inspection after heavy rain and at sensible intervals helps us spot changes while they are still manageable.
We should compare the wall with its original shape rather than waiting for a dramatic failure. Photos taken after construction are useful because memory is a poor surveying instrument. If movement is increasing, keep people and loads away from the affected area and arrange an appropriate assessment.
Inspecting for bulges, cracks, leaning, and settlement
Walk the full length and look for a face that bows outward, joints that have opened, caps that have shifted, or sections that lean. Check whether the ground above has cracked or settled and whether the base has washed away. Fresh movement matters more than an old mark that has remained unchanged.
After significant rain, look for new seepage, muddy discharge, ponding, or erosion near the outlet. Do not pressure-wash away evidence before recording it. A few clear photographs and notes about timing can help explain what the wall is doing.
Maintaining drainage outlets and surrounding soil
Keep outlets clear of leaves, mulch, mud, and plant growth. Make sure surrounding soil still falls in the intended direction and that new paving or garden edging has not blocked the route. Downpipes should discharge safely rather than saturating the retained area.
Repair washouts promptly and replace eroded soil in a way that does not bury drainage points. Avoid casually adding soil or heavy features behind the wall, since changing the upper load can change the wall’s behaviour.
Knowing which repairs are cosmetic and which are urgent
A chipped cap or small surface blemish may be cosmetic when the wall remains aligned, dry, and stable. A widening crack, growing bulge, leaning section, blocked drainage route, or sinking ground is a different category. We should judge the change, not just the size of the mark.
Useful first steps include keeping the area clear, photographing the movement, checking drainage, and seeking suitable advice when the cause is uncertain. Patching a crack can make the face look tidy while leaving the pressure behind it untouched.
Deciding when a wall needs rebuilding instead of a pep talk
Rebuilding may be necessary when the wall has lost alignment, its base has failed, the ground behind it is moving, or drainage cannot be restored without dismantling the structure. Rebuilding the visible face alone may not solve a failed foundation or unstable slope.
We should understand why the first wall moved before choosing the replacement. That might mean changing the drainage route, improving the base, reducing upper loads, using a different wall system, or obtaining a design suited to the site. A wall deserves encouragement, but it deserves a proper cause-and-effect investigation even more.
Frequently Asked Questions
How high can we build a retaining wall ourselves?
There is no universal safe height for every site. Height, soil, slope, drainage, nearby loads, materials, and local requirements all affect the design. Check the rules and seek suitable professional input where the wall is tall, heavily loaded, close to structures, or showing signs of movement.
Does every retaining wall need drainage?
Most walls need a planned way to manage water, although the exact arrangement varies. Surface runoff, groundwater, soil type, wall construction, and the outlet location all matter. Water should not be allowed to collect behind the wall simply because the face looks sound.
Should a retaining wall lean into the soil?
Many wall systems use a designed batter, meaning the wall leans slightly towards the retained soil. The amount depends on the system and design. We should follow the manufacturer’s or designer’s requirements rather than setting the angle by eye.
Can we build a retaining wall on a property boundary?
Possibly, but boundaries, easements, drainage effects, access, and local rules need checking first. A wall on or near a boundary can affect another property, so confirm the position and understand the relevant approval requirements before excavation.
What is the best material for a retaining wall?
The best material is the one suited to the site and installed according to its requirements. Segmental block, timber, concrete, masonry, and natural stone each have different strengths, limitations, maintenance needs, and construction details. Appearance should come after stability and drainage.
Why is my retaining wall bulging?
Bulging can result from water pressure, inadequate drainage, poor backfill, movement of the base, insufficient structural capacity, or added loads above the wall. Record the change, keep heavy loads away, and arrange an assessment before attempting a cosmetic repair.
How often should we inspect a retaining wall?
Inspect it periodically and after substantial rain, storms, nearby excavation, or changes to the garden. Look for leaning, bulging, cracks, settlement, erosion, blocked outlets, and new seepage. Early attention is usually simpler than dealing with a sudden failure.

You May Also Like
Retaining wall basics: how to hold back soil without letting trouble pile up